

Setting up WordPress
Once again, DigitalOcean has a good and detailed write-up on the WordPress installation1. We will quickly run-through the steps and modifications needed to make WordPress work from inside a container.
- Let’s create a MySQL database for WordPress. Login to MySQL in the LXC container with the password you created earlier.
root> mysql -u root -pCreate a database named wordpress, create user wordpressuser with password ChangeMe and grant access for the user to the database.
mysql> CREATE DATABASE wordpress DEFAULT CHARACTER SET utf8 COLLATE utf8_unicode_ci;
mysql> GRANT ALL ON wordpress.* TO 'wordpressuser'@'localhost' IDENTIFIED BY 'ChangeMe';
Apply the new changes and exit MySQL prompt.
mysql> FLUSH PRIVILEGES;
mysql> exit;- Modify configuration of Apache2 (in the container). Currently, Apache does not allow
.htaccessfiles which is needed by WordPress and many plugins to work properly (such as permalinks). Create a newwordpress.conffile as follows using000-default.confas a template.
root> cd /etc/apache2/sites-available
root> cp 000-default.conf wordpress.conf
root> vim wordpress.conf
Modify the configuration file to match something like below. By default, Apache serves file from /var/www/html (you can check if this is true in the bottom half of the Apache default page). We will install our WordPress in this directory and so we allow .htaccess here.
<VirtualHost *:80>
    <Directory /var/www/html/>
        AllowOverride All
    </Directory>
</VirtualHost>- We enable the configurations that we have just made. We also enable the rewrite module for Apache, so WordPress permalink works properly. Restart Apache to use new changes.
root> a2ensite wordpress
root> a2enmod rewrite
root> systemctl restart apache2- Download WordPress. We will download WordPress to a writable directory and decompress it.
root> cd /tmp && curl -O https://wordpress.org/latest.tar.gz
root> tar xzvf latest.tar.gz
Add a .htaccess file that WordPress can work with later.
root> touch /tmp/wordpress/.htaccessWe can create an upgrade directory for WordPress so it won’t run into permission issues when doing this by itself later.
root> mkdir /tmp/wordpress/wp-content/upgradeCopying the config file wp-config.php over from the template wp-config-sample.php. We will configure it later.
root> cp /tmp/wordpress/wp-config-sample.php /tmp/wordpress/wp-config.php- Configure WordPress. The first few configurations are done in the file
wp-config.php.
root> vim /tmp/wordpress/wp-config.php- First, we need to replace secret keys that WordPress uses to stay secure. WordPress.org provides a key generator, which we can use. (You might need a separate terminal window.)
root> curl -s https://api.wordpress.org/secret-key/1.1/salt/define('AUTH_KEY', 'VALUES COPIED FROM THE COMMAND LINE');
define('SECURE_AUTH_KEY', 'VALUES COPIED FROM THE COMMAND LINE');
define('LOGGED_IN_KEY', 'VALUES COPIED FROM THE COMMAND LINE');
define('NONCE_KEY', 'VALUES COPIED FROM THE COMMAND LINE');
define('AUTH_SALT', 'VALUES COPIED FROM THE COMMAND LINE');
define('SECURE_AUTH_SALT', 'VALUES COPIED FROM THE COMMAND LINE');
define('LOGGED_IN_SALT', 'VALUES COPIED FROM THE COMMAND LINE');
define('NONCE_SALT', 'VALUES COPIED FROM THE COMMAND LINE');- Change your database details.
define('DB_NAME', 'wordpress');
define('DB_USER', 'wordpressuser');
define('DB_PASSWORD', 'ChangeMe');- We let WordPress know that it should directly write to the file system and not ask for FTP details. Add this somewhere in the file.
define('FS_METHOD', 'direct');- Ask WordPress to use HTTPS if the original request is HTTPS. This avoids mixed-content security warnings and lets our page render correctly.
if (!empty($_SERVER['HTTP_X_FORWARDED_PROTO']) && $_SERVER['HTTP_X_FORWARDED_PROTO'] === 'https') {
    $_SERVER['HTTPS'] = 'on';
}
Finally, we are ready to copy WordPress from the tmp folder to the folder where Apache2 will be serving from.
root> cp -a /tmp/wordpress/. /var/www/htmlWe need appropriate ownership and permissions for our WordPress files. Apache runs as www-data user, and it needs to read and write the WordPress files to serve the site and to perform updates. We give ownership to all files to www-data user and group, and additionally set reasonable permissions for all files and directories. Adjust the permission settings if needed by your plugins.
root> chown -R www-data:www-data /var/www/html
root> find /var/www/html/ -type d -exec chmod 750 {} \;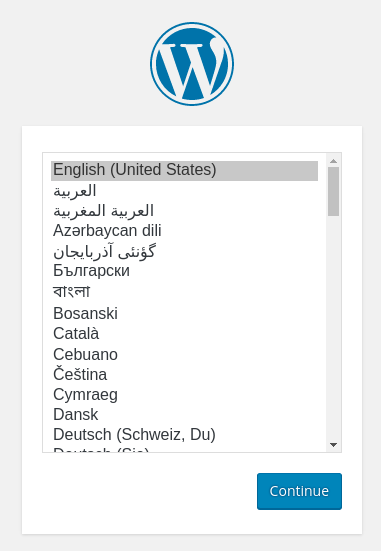
root> find /var/www/html/ -type f -exec chmod 640 {} \;- Continue with WordPress configurations online. Visit your subdomain
blog.warmwolf.comand you should see a WordPress language selection screen.
- Avoid using typical username such as
AdminorAdministrator. - Choose a strong password as WordPress bruteforcing solutions are really commonplace nowadays.
That should be it! WordPress should be installed correctly and accessible through your subdomain! On the last page, we end with some closing thoughts.
Organisation:
- On Page 1, we start with a bit of literature so we know what we will be doing later on.
- On Page 2, we create an unprivileged LXC container.
- On Page 3, we set up Apache2, MySQL and PHP in the container. We also set up our main Apache2 as a reverse proxy to serve pages from within the container.
- On Page 4, we set up WordPress inside the container.
- On Page 5, we end with some closing thoughts.